Thursday, November 25, 2010

We're Expecting - 4 Months In

If you know me personally, then you probably already know.  This is our first and we're really excited.  My wife and I have been married for a couple of years now.  This surely made 2010 a great year for us, and I can't imagine what 2011 would bring.

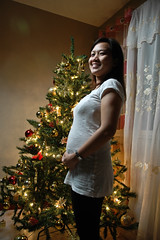
My wife asked me the other day for some photos of her and her tummy, so she show it to her boss abroad.  She said her boss has been asking her for photos to see how she looked like now that she is pregnant.  I took a snap of her, and being the Strobist that I am, I pulled out a lightstand, umbrella, and my flash and started setting up.  I took the picture on the left as she instructed, something that shows her tummy bigger than before.  I kinda liked it, but was thinking of something more artistic.  Something to keep for the photo album and to show the baby when eh/she grows up.  So I asked her to sit down, while I changed the setup


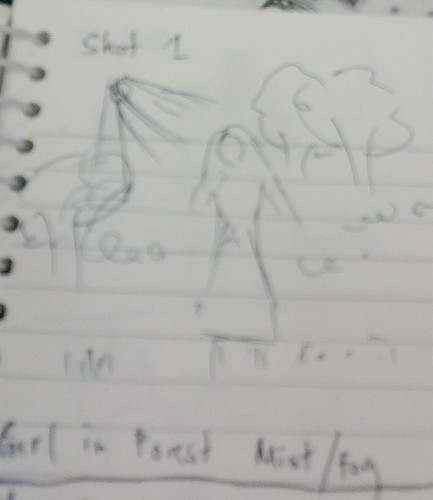
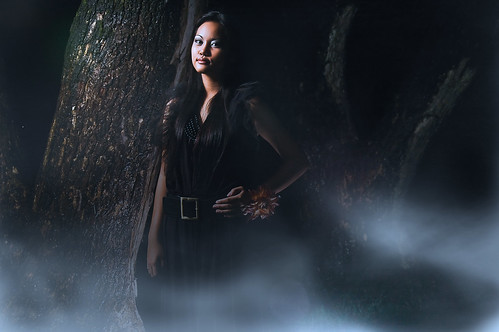
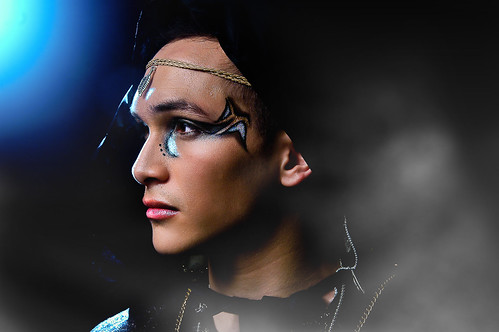
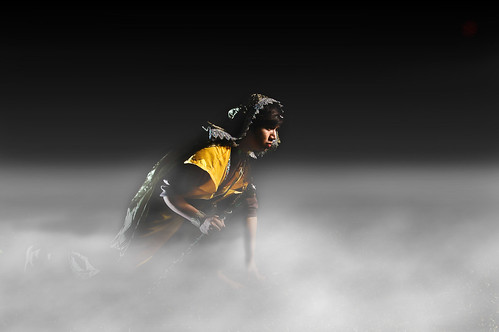
For you photographers out there this is a tip/trick I learned from the One Project I did last summer.  It's basically creating a black background out of nothing.  Before the details for that, let's see some of the photos from that night:


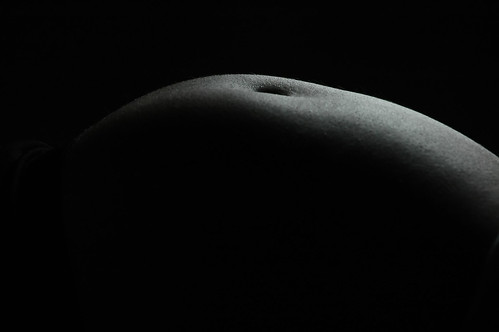
At 4 months, her tummy wasn't taht big yet, so I decided to light it differently to show the her curves.  See how dark the background is?  I didn't put anything behind her to cover up the living room curtains (that's what she had behind her).  The technique is to make sure your light only hits what you want to see in the final image.  Here are some steps for the invisible background:

1.  Put your camera on Manual mode, and to your lowest ISO possible

2. Use your maximum sync speed on your camera.  My D70 goes to 1/1000 and still trigger my flash with a YN04II remote trigger, but for the shots above I only used a 1/160 shutter speed and an aperture of f4.  If you need your background (and the picture over-all) to go darker and you are at your sync limit, adjust your aperture to a higher number (f5.6, f 8, etc) until you get the background your looking for.

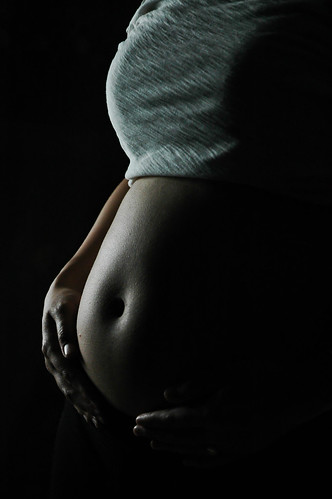
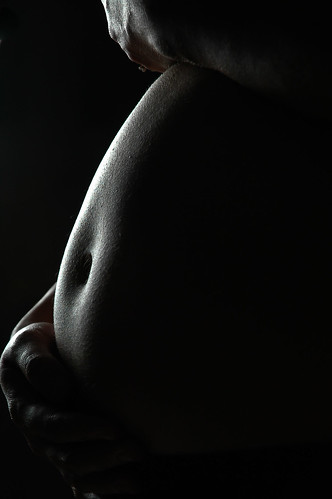
3  Bring in the flash, place it either in front or behind the subject (as in the examples above).  Use a diffuser, or even something that would block the light from the background.  For the photos above I used a black reflective umbrella that I closed halfway (see setup shot below).  You could just block your flash's light by taping a peice of black cardboard and it will do just fine.

4. Adjust your flash's power to match your desired shutter-aperture setting.  In the photos above I used 1/4th power.

And that's it. this should make your background as dark as possible.  Here's the setup shot (I just made my wife sit down while I set it up):


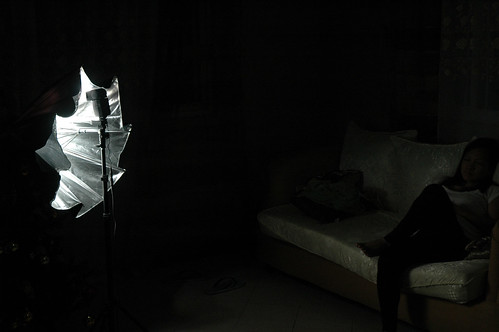
See how dark the photo was?  Only the things that the light will hit will show on the final photo.  If you have any suggestions or tips on making your own black background out of nothing, hit me up through the comments.

Sunday, November 21, 2010

Stretch that Shutter


I had the chance to photograph the beautiful Aly this weekend.  She's a co-worker now but was a cheerleader back in college.  I asked her to do some gymnast-like jumps for me.  She had some reservations, as she was one of those shy-types but after a few shots, she loosened up and started having fun with it.


As with my concept shoot a few weeks back, I started planning a few days before the shoot.  The plan was have Aly do her jumps and light her from the sides and one soft light upfront.  I think I was able to get as many ideas I got on the actual shoot.Unfortunately, I inadvertently threw it away with the other garbage i my pocket, so I can't show you how I visualized it. :(

update: here's how the set-up looked like for most of the shots:


Sketching what  I think the final photo will look like and how I would light it really helps out the process.  For example the top most image took only one shot (I was very lucky).  This also saved Aly from doing multiple jumps, which saves her some energy for the next shot. She was surprised that she could stretch like this, as she never saw herself stretching that much before. Here are some more shots:


About the Title

Except for the up most shot, Aly did need to take multiple jumps for the shots.  As much as I would like to get it with one frame,  it would be very difficult to time each jump and get what you want.  So what did I do?  I shot it hi-speed and did multiple clicks (burst mode) in each jump.  The flash trigger I used was a YN-04II, and my camera having an electronic shutter (D70) I was able to use a fast sync speed than most (some camera's only have a 1/250 sync speed).  The shots above were in the speed range of 1/500 to 1/1000 with the flash units on 1/4 power.  Having that speed enabled me to maximize the 3 frame per second limit on my camera. 

Also, my  camera's shutter is about 43,500 and counting, really close to the manufacturer's claim of 50,000.  To those who don't know, a DSLR life ends when it reaches the maximum number of shutter clicks (or on how many times you click that shutter to take a picture).  After that you would need to have your camera serviced and replace the shutter mechanism.  It's not cheap, mind you. It could be just a manufacturer's claim so they'll get more profit from repairs.  I kinda hope mine wouldn't die on me after 50,000 clicks, as I have a friend who has a camera that has more that 100,000 clicks and it's still working.  Then again, I have another colleague who's D40 died on him at 50,000 clicks.  So who knows?

Sunday, November 7, 2010

Weekend Gear Test: Softlighter and Nikon CLS

This test has been overdue for a loooooong time.  I purchased a Photek Softlighter II back in August, and I have been looking to make a review of the product ever since. You see, I haven't really tested it on another person except for myself.  I thought of using on my recent shoot, but the bad weather didn't give me the chance.  So when my pal Daryl came over the weekend, we took it out, dusted it out (literally) and took it for a spin.


What came in the box? There's the 46" inch umbrella (removable backing), the white cover and, not in the picture, 2 disks (1 silver and 1 gold) that you put inside the umbrella to add more light (silver) and warm up your light (gold).

The umbrella construction is quite solid, and sports 10 spokes rather than the traditional 8.  The shaft is removable at the end, so you don't poke your models eye out. This means you your light can get  as close (and as soft) as possible.

The umbrella can be used 3 ways.  It can be a black reflective umbrella, a shoot through umbrella (with the black cover removed) and lastly a umbrella box (reflective umbrella with the white cover added upfront). 

The silver disk that came with it gives you a stop (+1) more of light as Photek claims, which is to compensate for the light it eats up when the light is bounce to the umbrella and when it goes through the white cover (which is why the light is soft).

Here's how it looks like from the front.  The flash in this case is a Nikon SB-800.  It is totally inside the Softlighter and is totally covered.  It would be difficult for the SB-800's power menu to be changed, as you need to take off half of the cover, so we just used CLS to trigger it and control the power from the camera (I used a D80 in the test).  The good news, the black back cover and the white in front lets the CLS signal in.  Yes, even the black backing lets the signal in. If you're just using the slave feature of the SB-800, it also let's that light in to trigger your flash. In my test, it triggered the flash from 15 feet away, but unfortunately, I didn't go beyond 15 feet, but I think you can go up to 30 feet and still trigger it (I was just using the pop-up flash of the camera, more on that later).  So I adjusted the power from the camera and clicked away.  The light is really soft, and being a "round" softbox (the "experts" say it's not an Octabox) the light is controlled compared to a shoot-through umbrella.  Here are the other shots for the day.


And the setup shot :
Here are other Photek Softlighter II Reviews (much, much reliable than myself)


Not a CLS Review

I'm not a CLS expert (please ask Joe), but we kinda tested it anyway since we were using CLS that afternoon.  So, we found out that it worked even in a Softlighter and even from 15 feet away (or  possibly more) with just the pop-up flash (at pop-up flash "--" power setting), but we wanted to see how far we can go with just bare flash and the pop-up.  We tried at around a distance of 70-80 feet, with the pop-up power of the flash at Full, but no luck.

We moved a little closer at about 50-60ft with Full pop-up power and.....TADA!
This is very impressive, I should say.  I've been hearing from others who have tested it, but all of them have used another SB-XXX flash attached to the camera, adding more power to the signal.  I haven't seen any test with just the pop-up flash. This means you can use your CLS from 50ft away while maximizing your pop-up flash.  To see how far (and it is way, way farther as you might think) you can go while using a flash unit on-camera, check this out (he used a SB-900).

Also, we were using CLS and were also using the trick FP-mode thing which allows your shutterspeed to go as high as you can.  Too bad it's not available on my Nikon D70, but it is available on  Nikon D80 models and up (I think).  See more details here.

Wednesday, November 3, 2010

Shooting with a Concept


For any shoot I do, may it have a concept or not, I visualize what I will shoot and sketch (terribly) what I see will be the final image. This is sort of my goal lists of the shots I wanted to achieve.  I normally sketch around 20-30 shots, hoping to get at least one that would work.  I may tweak it a little bit on the actual shoot, depending on the situation, but I'll try to get it as close as possible. (Please bear with my sketches :) )


I also sketch the lighting set up for each shot, even if it's just the sun lighting the whole picture.  This helps a lot during the shoot, as it helps me visualize and direct the subjects better.  Sometimes it also helps "break the ice" when I show them the sketches and have a laugh about it.

The shot above was from a couple of weeks ago in the open areas of Clark, Pampanga.  This was a former US military service base that now houses the Philippine military (I think).  It's a beautiful place with a lot of open fields and woodland areas perfect for the mythology themed shoot.  Unfortunately, the weather was not cooperating with us.  We waited for the rain to slow down a little, and then started the set up.  Just before shooting, the rain started pouring again, and we were so wet that we decided to pack up and try again on a future date.  On our way back the rain stopped, and we saw this beautiful area with the setting sun lighting it.  It was around 4pm and the sun was going down fast.  

So I jumped out of the car, took out the gear as quickly as I could and had my set up ready in a few minutes.  This is where the sketches came up useful. Prior to the shoot, I have discussed to some of the subjects on what I wanted to do.  It also helped me get to know the subjects better, even though I only met them.  For those that I wasn't able to talk to, the sketches helped me visualize the set up that would be suitable for them.  The time I saved was priceless, as I was able to get as many shots that I needed.  I was shooting until it was so dark that my camera couldn't focus anymore.  Also by using portable flash units, I was able to create my light, even if the sun was going down. Here are some of the other shots for the day.


 It was a lot of fun and adds up to my learning.  I guess sometimes it takes a little challenge (rain) and some preparation (sketches) to make amazing photos.